泰斗学习
站点博客
The Ultimate Guide to Cat Flap Replacement: Why, When, and How

As a cat owner, it's vital to supply your feline friend with a comfy and practical way to enter and exit your home. A cat flap, likewise called a cat door, is an easy and effective solution that allows your cat to come and go as it pleases. However, like any other household product, cat flaps can break in time, requiring replacement. In this article, we'll check out the factors why cat flap replacement is needed, the indications that show it's time for a new one, and a step-by-step guide on how to replace a cat flap.
Why Replace a Cat Flap?
There are several factors why cat flap replacement is required:
- Wear and tear: Cat flaps go through consistent use, which can result in use and tear on the hinges, seals, and other moving parts.
- Weather condition damage: Exposure to rain, snow, and severe temperature levels can trigger the cat flap to deteriorate, resulting in water leakages and drafts.
- Bug control: Old or damaged cat flaps can offer an entry point for undesirable bugs, such as rodents, birds, or pests.
- Energy efficiency: A brand-new cat flap can help decrease heat loss and energy consumption, making your home more energy-efficient.
- Improved security: Modern cat flaps frequently feature advanced security features, such as lockable doors and magnetic seals, to avoid unapproved entry.
Signs that Indicate it's Time for a New Cat Flap
If you discover any of the following indications, it's most likely that your cat flap requires to be changed:
- Leaks and drafts: If you observe water or air dripping through the cat flap, it's time to think about a brand-new one.
- Difficulty opening or closing: If the cat flap becomes stuck or hard to open or close, it's most likely that the hinges or seals are worn.
- Sound: If the cat flap makes excessive noise when opening or closing, it might be a sign that the moving parts are broken.
- Pest problem: If you observe bugs entering your home through the cat flap, it's time to replace it with a brand-new one.
How to Replace a Cat Flap: A Step-by-Step Guide
Replacing a cat flap is a relatively simple DIY job that can be finished with standard tools and products. Here's a step-by-step guide:
Materials needed:
- A brand-new cat flap
- Screwdriver or drill
- Measuring tape
- Pencil or marker
- Wood screws (if necessary)
- Weatherstripping (if necessary)
Instructions:
- Measure the existing cat flap: Measure the width and height of the existing cat flap to guarantee that the brand-new one fits perfectly.
- Remove the old cat flap: Use a screwdriver or drill to get rid of the screws holding the old cat flap in location. Gently pry the cat flap out of the door or wall.
- Clean the area: Clean the location around the old cat flap to get rid of any particles or dirt.
- Mark the position of the new cat flap: Use a pencil or marker to mark the position of the brand-new cat flap on the door or wall.
- Drill pilot holes: Drill pilot holes for the screws that will hold the new cat flap in location.
- Install the brand-new cat flap: Insert the brand-new cat flap into the door or wall and screw it into location.
- Add weatherstripping (if required): Apply weatherstripping around the edges of the cat flap to avoid drafts and leaks.
Idea:
- Choose a cat flap that appropriates for your cat guardian Door installation (https://ead.alfadash.com.br)'s size and breed.
- Consider a cat flap with advanced security features, such as lockable doors and magnetic seals.
- Use a level to guarantee that the cat flap is installed straight and level.
- Check the cat flap before installing it to make sure that it works efficiently and quietly.
Regularly Asked Questions:
- Q: How long does it require to replace a cat flap?A: The time it requires to change a cat flap depends on the complexity of the task and the person's DIY skills. Usually, it takes about 30 minutes to an hour to finish the job.
- Q: Can I replace a cat flap myself?A: Yes, replacing a cat flap is a relatively easy DIY job that can be completed with standard tools and products. However, if you're not comfy with DIY tasks, it's advised to employ a professional.
- Q: How often should I change my cat flap?A: The frequency of replacing a cat flap depends on use and climate condition. Typically, a cat flap ought to be changed every 5-7 years.
- Q: What are the advantages of a new cat flap?A: A new cat flap can enhance energy efficiency, security, and comfort for your cat. It can also decrease sound and prevent pest infestation.
Conclusion:
Replacing a cat flap is a basic and necessary job that can improve the convenience and benefit of your feline buddy. By following the step-by-step guide laid out in this post, you can easily replace your old cat flap with a brand-new one. Remember to pick a cat flap that appropriates for your cat's size and type, and think about advanced security functions to prevent unapproved entry.
Extra Resources:
- Best Cat Flaps for Energy Efficiency: [link]
- How to Choose the Right Cat Flap: [link]
- Do It Yourself Cat Flap Installation Tips: [link]
By supplying your cat with a comfy and hassle-free way to get in and leave your home, you can enhance its total health and joy. Remember to replace your cat flap every 5-7 years to guarantee that it remains in good working condition.


The Ultimate Guide to Cat Flap Installation Service: Everything You Need to Know
As a cat owner, you want to provide your feline friend with the flexibility to come and go as they please. One of the very best ways to attain this is by setting up a cat flap, also called a cat door or pet door. A cat flap installation service can help you offer a safe and convenient way for your cat to access the outdoors while keeping the comfort and security of your home. In this article, we'll check out everything you need to understand about cat flap installation services, including the benefits, types of cat flaps, installation process, and more.
Advantages of a Cat Flap Installation Service
There are a number of advantages to setting up a cat flap in your home. Here are a few of the most substantial advantages:
- Convenience: A cat flap enables your cat to come and go as they please, without the need for you to continuously open and close doors.
- Increased flexibility: By providing your cat with access to the outdoors, you're offering them the liberty to check out and engage in natural habits.
- Improved mental health: Access to the outdoors can help lower stress and anxiety in felines.
- Minimized damage: Cats who are confined to the home might scratch or harm furnishings and carpets. By supplying a cat flap, you can redirect this habits to the outdoors.
Kinds Of Cat Flaps
There are numerous kinds of cat flaps offered, each with its special functions and advantages. Here are some of the most common types of cat flaps:
- Manual cat flaps: These are one of the most standard kind of cat flap and require your cat to push the flap open with their nose or paw.
- Magnetic cat flaps: These flaps have a magnetic closure that assists keep the flap shut when not in use.
- Automatic cat flaps: These flaps have a sensor that spots your cat's existence and opens the flap immediately.
- Microchip cat flaps: These flaps use microchip technology to recognize your cat and only enable them to go into or exit.
- Infrared cat flaps: These flaps use infrared sensors to discover your Free cat Flap installation quote's existence and open the flap.
Cat Flap Installation Process
The cat flap installation process usually involves the following actions:
- Assessment: A professional installer will evaluate your home to figure out the best area for the cat flap.
- Measurement: The installer will measure the width and height of the area where the cat flap will be installed.
- Cutting: The installer will cut a hole in the door or wall to accommodate the cat flap.
- Installation: The cat flap is installed into the hole, and any necessary changes are made.
- Evaluating: The installer will check the cat flap to guarantee it's working properly.
What to Consider When Choosing a Cat Flap Installation Service
When selecting a cat flap installation service, there are several aspects to consider. Here are a few of the most important things to think of:
- Experience: Look for a service with experience setting up cat flaps.
- Credibility: Check online reviews and request recommendations to make sure the service has an excellent track record.
- Quality of products: Make sure the service uses premium products and cat flaps.
- Price: Compare rates from different services to guarantee you're getting the very best value.
- Guarantee: Look for a service that offers a warranty or warranty.
Frequently Asked Questions
Here are some frequently asked concerns about cat flap installation services:
Q: How long does the installation process take?
A: The installation process typically takes about an hour, depending upon the intricacy of the installation.
Q: Can I set up a cat flap myself?
A: While it's possible to install a cat flap yourself, it's suggested to employ a professional to ensure the task is done properly and securely.
Q: Are cat flaps protect?
A: Yes, a lot of cat flaps are designed with security in mind and have functions such as magnetic closures or sensing units to prevent unauthorized access.
Q: Can I set up a cat flap in a glass door or wall?
A: Yes, it's possible to set up a cat flap in a glass door or wall, but it might need specialized tools and knowledge.
Q: How do I maintain my cat flap?
A: Regular cleaning and maintenance can help extend the life of your cat flap.
Conclusion
A cat flap installation service can supply a safe and practical method for your feline good friend to access the outdoors. By considering the benefits, kinds of cat flaps, and installation process, you can make an educated decision about whether a cat flap is best for you. Keep in mind to pick a credible and knowledgeable service to ensure the job is done correctly and safely.
Additional Tips
Here are some extra tips to remember:
- Consider the size: Make sure the cat flap is large enough for your cat to comfortably pass through.
- Select the right material: Consider the material of the cat flap and whether it's appropriate for your climate and weather.
- Think about the area: Consider the area of the cat flap and whether it's practical for your cat to access.
- Keep it clean: Regular cleansing and maintenance can help extend the life of your cat flap.

Door Replacement Companies: A Comprehensive Guide
In the realm of home enhancement and improvement, door replacement stands out as one of the most impactful upgrades. A well-selected door can significantly improve a home's aesthetics, energy performance, and security. The market is progressively crowded with many door replacement companies, each appealing stellar service, a large range of choices, and competitive pricing. This post aims to supply a succinct summary of door replacement companies, the elements to consider when picking one, and responses to common questions.
The Importance of Door Replacement
Changing doors serves several essential purposes:
- Enhanced Curb Appeal: A brand-new door can drastically alter the visual appeal of a home.
- Improved Energy Efficiency: Older doors might be drafty or poorly insulated, increasing energy costs.
- Increased Security: Modern doors integrate advanced security features.
- Noise Reduction: New doors can help reduce outside noise.
- Performance: Sometimes, doors become deformed or harmed, necessitating replacement for optimal operation.
Kinds of Doors to Consider
When considering door replacement, various alternatives exist, consisting of however not restricted to:
- Entry Doors: Main gain access to points that boost a home's appeal.
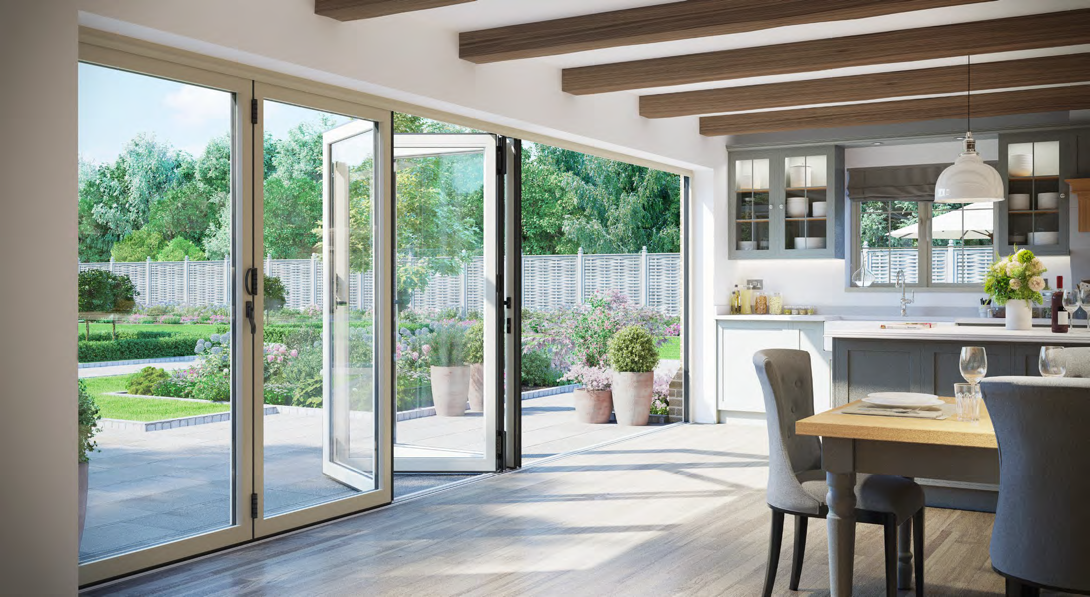
- Sliding Glass Doors: Ideal for linking indoor areas with outside patios.
- French Doors: Elegant alternatives for interior shifts and light enhancement.
- Garage Doors: A vital component for performance and curb appeal.
- Interior Doors: Necessary for separating rooms and enhancing privacy.
The choice of door type will affect the last feel and look of a home.
Elements to Consider When Choosing a Door Replacement Company
When picking a door replacement business, a number of elements can influence the decision-making procedure:
1. Reputation
- Consumer Reviews: Check online reviews and testimonials.
- Referrals: Ask buddies or household for recommendations.
- Local Ratings: Look at local rankings on platforms such as Better Business Bureau (BBB) or Angie's List.
2. Experience and Expertise
- Years in Business: Longevity can show reliability.
- Industry Certifications: Certifications from acknowledged market organizations can indicate quality.
3. Quality of Materials
- Door Materials: Ensure the business provides numerous materials, such as wood, fiberglass, and steel.
- Energy Efficiency Ratings: Look for doors with Energy Star ratings or similar certifications.
4. Installation Process
- Comprehending of Installation: Knowledge of the company's installation practices can prevent future problems.
- Warranty Information: Inquire about guarantees on both products and installation.
5. Cost Estimates and Financing Options
- Transparent Pricing: Request in-depth quotes to prevent surprise charges.
- Versatile Payment Plans: Some companies offer funding alternatives for extensive projects.
The Process of Door Replacement
Door replacement usually includes the following steps:
- Initial Consultation: Meeting with the door replacement company to discuss requirements, choices, and budget plan.
- Door Selection: Evaluating various styles, products, and features.
- Measurements: Accurate measurements are taken to make sure an ideal fit.
- Installation: The business will eliminate the old door and set up the new one, guaranteeing appropriate sealing and weatherproofing.
- Last Inspection: A walkthrough to confirm complete satisfaction with the new door and its installation.
This structured process ensures that house owners receive the best possible service and item for their financial investment.
Table: Cost Comparison of Different Door Types
| Door Type | Average Cost (Material Only) | Installation Cost (Approximate) | Total Cost Estimate |
|---|---|---|---|
| Entry Door | ₤ 500 - ₤ 3,000 | ₤ 200 - ₤ 800 | ₤ 700 - ₤ 3,800 |
| Sliding Glass Door | ₤ 300 - ₤ 2,500 | ₤ 150 - ₤ 600 | ₤ 450 - ₤ 3,100 |
| French Doors | ₤ 500 - ₤ 4,000 | ₤ 300 - ₤ 900 | ₤ 800 - ₤ 4,900 |
| Garage Door | ₤ 500 - ₤ 3,000 | ₤ 200 - ₤ 500 | ₤ 700 - ₤ 3,500 |
| Interior Door | ₤ 100 - ₤ 1,000 | ₤ 100 - ₤ 300 | ₤ 200 - ₤ 1,300 |
Regularly Asked Questions (FAQs)
1. How do I understand when it's time to replace my door?
Typical signs consist of warping, problem opening or closing, noticeable damage, drafts, and a considerable boost in energy bills.
2. Can I change my door myself?
While DIY options are readily available, it is recommended to employ professionals to make sure proper installation and avoid problems.
3. How long does door replacement take?
The installation of a basic door typically takes between a couple of hours to a full day, depending upon the complexity and the specific requirements.
4. What type of door is best for energy efficiency?
Fiberglass and steel doors are normally the most energy-efficient, using exceptional insulation homes compared to conventional wood doors.

5. Exist financing choices readily available for door replacement?
Numerous companies use financing strategies that permit homeowners to spread the cost with time, making it simpler to manage expenses.
When considering door replacement, it is vital to weigh the numerous choices offered, think about the aspects mentioned, and pick a reputable business that satisfies one's specific requirements. A brand-new door can offer more than just visual appeal; it boosts security, energy efficiency, and general comfort within the home. By comprehending the market and making informed decisions, homeowners can ensure that they obtain maximum worth from their door replacement job.
Quality Window Repair: Essential for Home Maintenance and Energy Efficiency
Windows are not simply openings in a wall; they are crucial aspects that supply natural light, ventilation, and security versus the elements. Over time, however, windows can deteriorate due to wear and tear, climate condition, or absence of upkeep. When this occurs, it's necessary to address the concerns promptly to make sure the ongoing performance and visual appeal of your home. Quality window repair is a vital element of home maintenance that can considerably impact energy effectiveness, security, and overall comfort. This post explores the importance of quality window repair, common issues, and the actions house owners can take to ensure their windows remain in top condition.
The Importance of Quality Window Repair
Enhancing Energy Efficiency
One of the main benefits of quality window repair is the improvement in energy performance. When windows remain in excellent condition, they assist maintain a constant indoor temperature level by preventing drafts and decreasing the need for extreme heating or cooling. This can lead to substantial savings on energy bills and a more sustainable home environment. According to the U.S. Department of Energy, correctly sealed and insulated windows can lower energy costs by as much as 25%.
Improving Security
Windows are a typical entry point for burglars. Cracked glass, loose frames, or faulty locks can compromise the security of your home. Quality window repair involves addressing these problems to ensure that your windows are safe and secure which your family is safe. Changing damaged glass, tightening up loose frames, and setting up robust locking systems are vital steps in boosting home security.
Preserving Aesthetic Appeal
Visual appeals play a substantial function in the value and livability of a home. Damaged or badly kept windows can detract from the total look of your property, making it look neglected and disregarded. Quality window repair can bring back the appeal and beauty of your windows, adding to a more inviting and enjoyable living environment.
Extending Window Lifespan
Routine upkeep and prompt repairs can extend the life expectancy of your windows, postponing the need for a complete replacement. This can be a cost-efficient solution, as window replacement can be pricey. By resolving minor problems early, you can prevent them from intensifying into significant problems that require a more substantial investment.
Typical Window Issues
Broken or Broken Glass
One of the most common concerns homeowners face is cracked or broken glass. This can happen due to unintentional damage, extreme climate condition, or aging. Split glass not just compromises security however also allows cold air to get in and warm air to get away, affecting energy performance.
Leaky Frames
Dripping Window Repairman frames are another regular problem. Gradually, the seal between the window frame and the wall can break down, causing water seepage and drafts. Leaks can cause water damage to the surrounding walls and floors, and they can likewise promote the growth of mold and mildew.
Sticking or Malfunctioning Windows
Sticking or malfunctioning windows are irritating and can be a security danger. This problem often emerges from worn-out or broken components, such as hinges, sashes, or tracks. Sticking windows can also indicate problems with the window frame, such as warping or growth due to temperature level changes.
Drafty Windows
Breezy windows signify poor insulation and can cause uncomfortable living conditions. Drafts occur when there are gaps or fractures in the window frame or when the weatherstripping is worn out. Sealing these gaps can substantially enhance the energy effectiveness of your home.

Peeling Paint or Rotting Wood
For homes with wood windows, peeling paint or decomposing wood can be a major issue. Wood is vulnerable to moisture damage, which can lead to decaying and structural weakness. Regular painting and sealing can prevent these concerns and extend the life of wooden windows.
Foggy or Cloudy Insulated Glass
Foggy or cloudy insulated glass is a sign that the seal in between the panes has stopped working. This can take place due to age or damage, and it affects the window's ability to insulate. Foggy glass is not just unpleasant but likewise lowers visibility and energy effectiveness.
Actions for Quality Window Repair
Evaluate the Damage
Before beginning any repair, it's crucial to examine the extent of the damage. This includes identifying the type of window (e.g., single-pane, double-pane, wood, vinyl) and the particular problems (e.g., split glass, leaky frame, sticking sash). A thorough evaluation will assist you figure out the very best course of action and the products required for the repair.
Collect the Necessary Tools and Materials
Quality window repair needs the right tools and products. Depending on the problem, you may require:
- Glass cutter and replacement glass for split or broken glass.
- Caulk and sealant for sealing gaps and leakages.
- Weatherstripping to improve insulation and avoid drafts.
- Screwdrivers and replacement hardware for stuck or malfunctioning windows.
- Sandpaper and primer for peeling paint or rotting wood.
- Dehumidifier and silica gel packets for foggy or cloudy insulated glass.
Fixing Cracked or Broken Glass
- Get rid of the broken glass: Carefully eliminate the damaged glass using a glass suction cup or pliers. Guarantee you use protective gloves and safety glasses to prevent injury.
- Step the opening: Measure the dimensions of the opening to guarantee the replacement glass fits perfectly.
- Install the new glass: Cut the replacement glass to size using a glass cutter. Apply a thin layer of glazing compound around the edges of the opening, and thoroughly put the new glass in the frame.
- Secure the glass: Use glazing indicate secure the glass in location. Apply another layer of glazing compound over the points and smooth it with a glazing tool. Permit the compound to dry before painting.
Sealing Leaky Frames
- Tidy the location: Remove any old caulk or sealant from the window frame and the surrounding area. Tidy the surface areas with a degreaser to make sure a strong bond.
- Apply caulk: Use a premium, weather-resistant caulk to seal any spaces or cracks. Use the caulk in a smooth, continuous bead and press it into the gaps to guarantee a tight seal.
- Smooth and finish: Smooth the caulk with a caulk finishing tool or a damp finger. Enable it to dry totally before painting.
Fixing Sticking or Malfunctioning Windows
- Lubricate the parts: Apply a silicone-based lubricant to the hinges, sashes, and tracks to lower friction and improve movement.
- Change the sash: If the window is sticking, you might need to adjust the sash. This can be done by loosening up or tightening up the screws that hold the sash in location.
- Replace hardware: If the lubricant and adjustments do not resolve the problem, it might be necessary to replace damaged or broken hardware. This consists of hinges, locks, and rollers.
Addressing Drafty Windows
- Check the weatherstripping: Inspect the weatherstripping around the window frame and sash. If it is broken or harmed, it should be replaced.
- Install brand-new weatherstripping: Choose the proper type of weatherstripping for your window (e.g., foam tape, V-strip, felt). Measure and cut the weatherstripping to fit, and install it according to the manufacturer's instructions.
- Seal spaces: Use caulk or broadening foam to seal any spaces between the window frame and the wall. This will assist avoid air leakages and enhance energy performance.
Repairing Peeling Paint or Rotting Wood
- Remove old paint: Use a paint scraper or sandpaper to eliminate peeling paint from the window frame. Sand the surface to produce a smooth, even finish.
- Treat rot: If there is any rot, utilize a wood hardener to stabilize the impacted areas. Eliminate any loose or decayed wood and fill the gaps with wood filler.
- Prime and paint: Apply a top quality guide to the dealt with areas, followed by a resilient exterior paint. This will protect the wood from wetness and avoid more deterioration.
Handling Foggy or Cloudy Insulated Glass
- Recognize the cause: Determine whether the foggy glass is brought on by a stopped working seal or condensation inside the window. If the seal is undamaged but the glass is still foggy, it may be due to condensation.
- Replace the glass: If the seal has stopped working, the very best service is to replace the insulated glass unit (IGU). This can be done by a professional window repair service or by carefully getting rid of and replacing the IGU yourself.
- Utilize a dehumidifier: If the problem is condensation, utilize a dehumidifier to lower humidity levels in the space. You can also put silica gel packages inside the window frame to absorb moisture.
When to Call a Professional
While lots of window repairs can be managed by house owners, there are circumstances where expert assistance is required:
- Complex repairs: If the repair includes elaborate parts or specialized abilities, it's best to call an expert. This consists of replacing IGUs or dealing with substantial wood rot.
- Security issues: Working with glass or heavy window components can be unsafe. If you're not comfortable with the task, it's safer to work with a professional.
- Service warranty issues: If your windows are still under service warranty, trying to repair them yourself might void the warranty. In this case, get in touch with the maker or a qualified expert.
FAQs
How often should windows be examined for upkeep?
House owners ought to inspect their windows at least two times a year, generally in the spring and fall. This allows you to catch and attend to issues before they become more major.
Can I repair foggy double-pane windows myself?
While you can try to eliminate condensation, the very best option is usually to replace the insulated glass unit (IGU). This can be a complex job and is often best delegated specialists.
What materials are best for weatherstripping?
Foam tape, V-strip, and felt are popular options for weatherstripping. Foam tape is easy to install and supplies good insulation, while V-strip is more resilient and appropriate for high-use windows. Felt is an affordable alternative that works well for short-lived fixes.
How can I avoid wood windows from decomposing?
Regular painting and sealing can prevent wood windows from rotting. It's likewise important to resolve any water damage promptly and to ensure correct drainage around the window.
Is it less expensive to repair or replace a window?
The expense of repair versus replacement depends on the extent of the damage. Minor concerns like stuck windows or peeling paint can be resolved with repairs, which are often more cost-effective. However, if the damage is comprehensive or the window is old, replacement might be the better alternative.
How can I evaluate if my windows are dripping air?
You can use a smoke stick or a lit candle light to check for air leaks. Move the smoke or flame around the window frame. If the smoke or flame relocations, it suggests an air leakage.
Quality window repair is a vital aspect of home maintenance that can boost energy efficiency, improve security, and preserve the visual appeal of your residential or commercial property. By addressing typical problems like cracked glass, dripping frames, and breezy windows, house owners can guarantee their windows continue to function effectively and stay a valuable possession to their home. Whether you take on the repairs yourself or hire an expert, routine maintenance and prompt repairs are vital for the durability and performance of your windows.
Additional Resources
- DIY Window Repair Kits: Many hardware stores provide DIY window repair packages that consist of the tools and materials required for common repairs.
- Energy Efficiency Tips: The U.S. Department of Energy provides resources on improving window energy efficiency.
- Specialist Window Repair Services: Search for certified window repair experts in your location to ensure premium service and workmanship.
By making the effort to comprehend and resolve window problems, property owners can enjoy a more comfy, safe and secure, and energy-efficient home.
Fixing Conservatory Damage: A Comprehensive Guide
Conservatories are a popular addition to many homes, using a space that combines the beauty of the outdoors with the comfort of indoor living. Nevertheless, like any structure, conservatories can suffer from wear and tear in time. Whether it's due to harsh weather, age, or easy accidents, damage to a conservatory can be both undesirable and pricey. This post provides a comprehensive guide on how to determine and fix typical conservatory damage, guaranteeing that your space stays functional and aesthetically pleasing.
Identifying Common Conservatory Damage
Before you can fix the damage, you need to identify what type of damage your conservatory has sustained. Here are some typical issues to keep an eye out for:
Leaking Roofs
- Indications: Water stains on the ceiling, wet patches, and visible water droplets.
- Causes: Loose or damaged roof tiles, malfunctioning seals, or clogged up gutters.
Split or Broken Glass
- Signs: Visible fractures, shattered glass, or gaps in the window frames.
- Causes: Impact from falling objects, severe temperature level changes, or bad setup.
Structural Issues
- Signs: Sagging or irregular floors, creaking noises, or visible gaps in between panels.
- Causes: Poor structure, water damage, or age-related weakening.
Moist and Mold
- Indications: Musty odors, black spots on walls, and peeling paint or wallpaper.
- Causes: Poor ventilation, water leaks, or high humidity levels.
Faulty Seals and Gaskets
- Indications: Drafts, cold spots, and water seepage around doors and windows.
- Causes: Aging products, poor maintenance, or incorrect setup.
Actions to Fix Conservatory Damage
Once you have actually recognized the kind of damage, you can take the needed actions to repair it. Here's a detailed guide to assist you through the process:
Assess the Damage
- Check the whole conservatory: Check for any noticeable signs of damage, including leaks, cracks, and structural issues.
- Document the damage: Take photos and make notes of the extent and place of the damage.
Focus on Repairs
- Address immediate issues first: Leaks and structural problems need to be fixed immediately to prevent more damage.
- Strategy for long-lasting repairs: Address cosmetic issues and maintenance jobs as part of a longer-term strategy.
Fix Leaking Roofs
- Check the roof: Check for loose or damaged tiles, faulty seals, and clogged up gutters.
- Replace or repair damaged tiles: Use matching tiles and guarantee they are securely secured.
- Clean and unclog seamless gutters: Remove debris and ensure water can flow easily.
Change Cracked or Broken Glass
- Get rid of the damaged glass: Use security gear and follow correct disposal treatments.
- Step the opening: Ensure you have the precise dimensions for the replacement glass.
- Set up brand-new glass: Use a professional if needed, and guarantee the glass is correctly sealed and protected.
Address Structural Issues
- Strengthen the structure: If the conservatory is drooping, you may require to enhance the structure or add assistance beams.
- Repair or replace damaged panels: Use top quality products and ensure they are properly set up.
- Look for water damage: Dry out any affected areas and treat with a waterproof sealant.
Tackle Damp and Mold
- Improve ventilation: Install vents or a dehumidifier to reduce moisture levels.
- Clean and deal with affected locations: Use a mold-killing solution and guarantee the location is thoroughly dry.
- Seal any gaps: Use caulk or silicone to seal gaps around windows and doors.
Replace Faulty Seals and Gaskets
- Eliminate old seals: Use a scraper or putty knife to eliminate any old or damaged seals.
- Set up brand-new seals: Use top quality silicone or rubber seals and guarantee they are effectively fitted.
- Test for drafts: Use a smoke test or a draft detector to guarantee the seals work.
Maintenance Tips to Prevent Future Damage
Avoidance is essential to maintaining the durability and functionality of your conservatory. Here are some maintenance tips to help you keep your fixing conservatory damage in top condition:
- Regular Inspections: Conduct a thorough evaluation of your conservatory a minimum of once a year to capture any issues early.
- Clean Gutters and Drains: Ensure that rain gutters and drains are complimentary from debris to avoid water damage.
- Inspect Seals and Gaskets: Regularly inspect and change seals and gaskets to avoid drafts and water seepage.
- Keep Proper Ventilation: Ensure that your conservatory is well-ventilated to avoid moist and mold.
- Safeguard from Extreme Weather: Use protective covers or treatments to protect your conservatory from severe climate condition.
FAQs
Q: How typically should I examine my conservatory for damage?A: It is recommended to check your conservatory a minimum of as soon as a year. However, if you reside in an area with extreme weather conditions, you may wish to inspect it more regularly.
Q: Can I fix a leaking roof myself, or should I call a professional?A: If the leak is small and you have the essential tools and skills, you can attempt to fix it yourself. Nevertheless, for more extensive damage, it is best to call a professional to ensure the repair is done correctly and securely.
Q: What is the very best way to prevent wet and mold in my conservatory?A: The best method to prevent wet and mold is to make sure proper ventilation. Set up vents or a dehumidifier, and routinely tidy and dry any affected locations.
Q: How can I enhance the structure of my conservatory?A: To strengthen the structure, you can add assistance beams, reinforce the existing structure, or speak with a professional for advanced services.
Q: What kind of glass should I use for my conservatory?A: For security and energy performance, it is recommended to utilize double-glazed or triple-glazed glass with a low-emissivity (low-E) finish.
By following these steps and maintenance tips, you can guarantee that your conservatory remains a stunning and functional area for years to come. Whether you pick to deal with the repairs yourself or look for professional help, resolving conservatory damage immediately is important to keeping the stability and value of your home.

Repairing Conservatory Frames: A Comprehensive Guide
Conservatories have actually become a precious staple in numerous homes, using a harmonious mix of indoor comfort and outside beauty. They work as sunlit lounges, lively greenhouses, or serene retreats, boosting both the visual appeal and worth of a home. Nevertheless, like all structures, conservatories go through wear and tear, especially their frames. With time, exposure to the elements, and general aging can cause damage that demands repairs. This article provides a substantial guide on repairing conservatory frames (47.98.87.87), resolving typical issues, laying out repair approaches, and suggesting preventative measures to extend your conservatory's life expectancy.
Typical Issues with Conservatory Frames
Understanding the typical problems dealt with by conservatory frames is necessary to efficient repairs. Here are some regularly experienced issues:
- Water Damage: Over time, water can permeate into frames, resulting in decaying wood or rusting metal.
- Damages and Scratches: Everyday wear and tear can develop unattractive damages and scratches on different frame products.
- Contorting or Bowing: Changes in temperature level and humidity can cause frames to warp or bow, impacting structural stability and looks.
- Failed Seals: The seals around the glass panels can deteriorate, leading to leaks and condensation accumulation.
- Rust and Corrosion: Frames made from metal can experience rust and rust, particularly if not effectively safeguarded versus moisture.
Examining the Damage
Before embarking on any repairs, it's important to examine the damage completely:
- Inspect the Frames: Look for noticeable indications of damage such as fractures, bowing, or decay. Utilize a screwdriver or comparable tool to inspect the strength of wood frames.
- Examine the Seals: Examine the seals around glass panels for indications of wear and tear.
- Examine the Glazing Bars: Ensure there are no indications of rust or decay on the bars holding the glass panes.
After this evaluation, you can continue with the suitable repairs based on the determined issues.
Repair Methods for Conservatory Frames
The repair approaches will differ based on the type of frame-- wood, aluminum, or UPVC (unplasticized polyvinyl chloride). The following describes the most typical repair strategies:
1. Wooden Frames
- Repairing Rot: For small rot, cut away the damaged area with a sculpt. Deal with the exposed location with wood preservative before using epoxy wood filler to restore its shape. Sand smooth when dry.
- Loose Connections: Tighten any loose screws or joints and apply wood glue where needed. In extreme cases, brackets might require to be set up to reinforce structural integrity.
- Sanding and Refinishing: Sand down scratches and dents and use a guide followed by weather-resistant paint or varnish to safeguard the wood.
2. Aluminum Frames
- Cleaning and Touch-up: Remove any corrosion with a wire brush and tidy the frame utilizing a cleaning agent solution. Use a touch-up paint developed for metal to cover scratches and chips.
- Sealing Joints: Inspect the joints for loose screws or rivets. Tighten them carefully and use a silicone sealant to prevent water ingress.
3. UPVC Frames
- Cleaning: Use a non-abrasive cleaner to remove spots and dirt. Avoid utilizing anything that might scratch the UPVC surface area.
- Sealing Leaks: Check the seals around the glass panes. If they are used, replace them with brand-new rubber seals to prevent leaks.
- Repairing Cracks: Small cracks can be fixed with a UPVC adhesive. For larger cracks, areas might require to be changed entirely.
Preventative Maintenance Tips
Preventing frame damage is frequently much easier and more affordable than repairing it. Here are necessary tips to maintain your conservatory frames:
- Regular Inspections: Conduct biannual checks of the frames and seals to capture any indications of wear early.
- Cleaning up: Regularly tidy the frames and glass to decrease the accumulation of dirt and gunk which can trigger wear and tear.
- Seal Maintenance: Regularly check and change seals to avoid leaks. Guarantee they are cleaned up and totally free from debris.
- Weatherproofing: Consider applying a weatherproofing agent appropriate for the frame product. This can include an additional layer of defense from the elements.
- Plant life Management: Trim any overhanging branches or plant life around the conservatory that could potentially scratch or damage the frames throughout storms or heavy winds.
Frequently Asked Questions
1. How frequently should I examine my conservatory frames?
It is suggested to examine your conservatory frames two times a year, preferably in spring and fall, to capture any prospective issues before they aggravate.
2. Can I repair conservatory frames myself?
Lots of small repairs can be done by homeowners with standard DIY skills. Nevertheless, for substantial damage or structural issues, it's best to speak with a professional for repairs.
3. When should I think about replacing frames instead of repairing them?
If the damages are comprehensive and impact the structural integrity or if the products have actually reached the end of their life-span, it might be more cost-efficient to change the frames.
4. What is the very best product for conservatory frames?
Each material has its advantages; wood uses aesthetic appeal, aluminum is incredibly durable, and UPVC is low-maintenance. The very best product depends upon specific requirements and ecological conditions.

5. How can I decrease condensation in my conservatory?
Enhancing ventilation through windows, using dehumidifiers, and making sure adequate insulation can help lower condensation in your conservatory.
In conclusion, the repair and maintenance of conservatory frames are essential for sustaining the sophistication and functionality of this precious home function. Equipped with the knowledge of common issues, repair techniques, and preventative steps, house owners can guarantee their conservatory remains a cherished area for years to come. Routine maintenance not only boosts aesthetics but also preserves the stability and worth of the property, making it well worth the effort.
Window Replacement Near Me: A Comprehensive Guide
When it concerns home enhancement, one of the most impactful upgrades a homeowner can make is window replacement. New windows can boost a home's aesthetic appeal, enhance energy effectiveness, and even increase home worth. However, the procedure might seem difficult, especially when browsing for credible service providers close by. This post checks out the different factors to consider when selecting window replacement services, and provides helpful ideas, FAQs, and a contrast table of common window types.
Comprehending the Importance of Window Replacement
Windows play an essential role in a home's performance and appearance. They not just provide natural light and ventilation but also contribute to energy effectiveness and security. Here are some crucial advantages of changing windows:
Enhanced Energy Efficiency
- New windows can considerably decrease energy bills, especially if the old ones are breezy or single-pane.
Enhanced Aesthetics
- Upgrading old windows can supply a fresh look to your home, making it more welcoming to guests and enhancing curb appeal.
Increased Property Value
- Quality window replacements can boost the home's market value, making it an appealing option for prospective purchasers.
Sound Reduction
- Modern windows are developed to lessen outside sound, improving indoor convenience.
Aspects to Consider When Searching for Window Replacement Services
Picking a reliable window replacement service is critical for an effective upgrade. Here are the main factors to think about throughout your search:
1. Experience and Reputation
- Look for companies with a solid track record in window replacement.
- Check out consumer reviews and reviews to gauge complete satisfaction levels.
2. Licensing and Insurance
- Ensure the contractor is licensed and carries liability insurance.
- This protects house owners from potential liabilities in case of accidents.
3. Warranty and After-Sales Service
- Ask about service warranties on both the windows and the installation.
- A great guarantee indicates self-confidence in the product and workmanship.
4. Energy Star Ratings
- Inspect if the windows are Energy Star rated.
- This ensures optimum energy effectiveness, which can result in savings in energy costs.
5. Series of Products
- Select a service provider that provides a range of window types and designs.
- Customization choices permit house owners to select windows that match their requirements and choices.
6. Quotes and Pricing
- Obtain quotes from numerous companies to compare prices.
- Be cautious of uncommonly low quotes, as they might show below average products or services.
Actions to Finding Window Replacement Near You
Discovering the best window replacement services close by does not have to be a frustrating job. Here are a few actions to streamline the process:
Conduct Online Research
- Usage search engines and online directory sites to find local alternatives.
Request for Recommendations
- Seek advice from friends, household, or next-door neighbors who have actually just recently changed their windows for tips.
Examine Credentials
- Verify licenses, registration, and insurance coverage claims on the company's site or through local directory sites.
Set up Consultations
- Consult with potential contractors to discuss your requirements and get a feel for their professionalism.
Evaluation Contracts Carefully
- Before finalizing, guarantee you understand all terms, including expenses, timelines, and warranties.
Types of Windows Available for Replacement
When thinking about window replacement, it's important to familiarize yourself with the different kinds of windows available. Here's a contrast table to assist house owners understand their alternatives:
| Window Type | Description | Pros | Cons |
|---|---|---|---|
| Double-Hung | 2 sashes that slide vertically. | Easy to clean up; good ventilation. | Can be costly; can experience leaks. |
| Sash | Hinged at one side, opens outside. | Excellent energy efficiency; simple to operate. | Needs area to open; may not fit all designs. |
| Sliding | Operates by moving horizontally. | Suitable for large openings; simple to tidy. | Might not appropriate for standard designs. |
| Bay/Bow | Develops an extending section of the wall. | Enhances aesthetic appeals; great for views. | Expensive installation. |
| Picture | Fixed window that offers unblocked views. | Maximum light; no need for operability. | Not functional for ventilation. |
Frequently Asked Questions (FAQs)
What is the typical cost of window replacement?
The cost can differ widely based on window type, size, materials, and installation complexity. Usually, homeowners can anticipate to pay between ₤ 300 to ₤ 1,000 per window, omitting installation expenses.
For how long does window replacement take?
Usually, changing a window can take anywhere from a few hours to a couple of days for the whole home, depending upon the number of windows and the complexity of the installation.
Should I change all windows at the same time?
While it's possible to replace windows gradually, replacing simultaneously can typically be more economical and makes sure uniformity in look and energy efficiency throughout your home.
Are DIY window replacement packages readily available?
Yes, however it's a good idea to seek advice from with experts for safety and precision, especially for more complex setups.
How can I maintain my new windows?
Frequently tidy the windows, inspect seals, and follow the maker's maintenance guidelines to prolong their life-span and efficiency.
Discovering "Window Replacement Near Me - git.selbstlernserver.de site," can unlock many advantages for property owners seeking to update their spaces. By thinking about important elements and understanding various window types, homeowners can make informed decisions that improve their homes both visually and functionally. With the best information and technique, window replacement ends up being a manageable and fulfilling home improvement task.
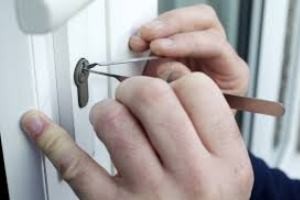
Best Car Locksmiths in Luton: Your Ultimate Guide to Reliable Automotive Security
In the busy town of Luton, where life is fast-paced and cars are a crucial part of day-to-day regimens, the significance of reputable car locksmith services can not be overemphasized. Whether you've locked your keys in the car, lost your keys, or require a new key made, having access to a relied on car locksmith can save you time, tension, and cash. This post dives into the best car locksmiths in Luton, supplying insights into their services, know-how, and why they stand apart in the market.
Intro to Car Locksmith Services in Luton
Car locksmith professionals in Luton use a vast array of services to ensure that your vehicle stays safe and secure and accessible. These professionals are geared up with the most recent tools and technology to handle various automotive lock-related issues, from simple key extractions to intricate transponder key programming. Whether you're handling a modern-day car with advanced security features or an older model, a competent car locksmith can provide the essential help.
Key Services Offered by Car Locksmiths in Luton
Key Extraction and Replacement
- If you've inadvertently locked your type in the car or lost them, a car locksmith can extract the keys without causing damage to your vehicle. They can also replace lost or harmed keys quickly and effectively.
Key Duplication
- Required an additional set of keys for your car? Car locksmith professionals can duplicate your existing keys, ensuring that you constantly have a backup.
Transponder Key Programming
- Modern automobiles frequently feature transponder keys, which need programming to work with the car's onboard computer system. A professional car locksmith can program these keys to guarantee they work correctly.
Ignition Repair and Replacement
- If your car's ignition switch is defective or harmed, a car locksmith can repair or replace it, ensuring that your vehicle begins efficiently.
Lock Cylinder Replacement
- For lorries with damaged or damaged lock cylinders, a car locksmith can replace the cylinder to enhance security.
Push-button Control Programming
- Lots of automobiles come with remote key fobs that can lock and open the vehicle, open the trunk, and even begin the engine. A car locksmith can program these push-button controls to work with your car.
Car Lockout Assistance
- In case of a lockout, a car locksmith can offer quick and efficient service to get you back into your vehicle.
Top Car Locksmiths in Luton
Luton Locksmith Services
- Solutions: Key extraction, key duplication, transponder key programming, ignition repair, lock cylinder replacement, push-button control programming, car lockout help.
- Why Choose Them: Luton Locksmith Services is understood for its 24/7 schedule and fast reaction times. Their team of experienced locksmiths is geared up with the current tools and innovation to manage any lock-related problem.
- Contact Information: [Contact number], [Website]
Beds Locksmiths
- Solutions: Key extraction, key duplication, transponder key programming, ignition repair, lock cylinder replacement, push-button control programming, car lockout support.
- Why Choose Them: Beds Locksmiths use competitive rates and a no-obligation quote service. They are known for their friendly and professional technique, making them a top choice for many citizens in Luton.
- Contact Information: [Contact number], [Site]
Luton Mobile Locksmith
- Services: Key extraction, key duplication, transponder key programming, ignition repair, lock cylinder replacement, remote control programming, car lockout support.
- Why Choose Them: Luton Mobile Locksmith provides mobile services, meaning they can pertain to you, whether you're at home, work, or on the side of the road. Their 24/7 emergency service ensures that you're never left stranded.
- Contact Information: [Telephone number], [Website]
Luton 24/7 Locksmith
- Services: Key extraction, key duplication, transponder key programming, ignition repair, lock cylinder replacement, remote control programming, car lockout assistance.
- Why Choose Them: Luton 24/7 Locksmith is committed to offering quickly and reliable services. They offer a 30-minute action time and are readily available 24/7 to assist with any automotive lock-related issues.
- Contact Information: [Telephone number], [Site]
Bedfordshire Locksmith
- Solutions: Key extraction, key duplication, transponder key programming, ignition repair, lock cylinder replacement, push-button control programming, car lockout help.
- Why Choose Them: Bedfordshire Locksmith has a group of extremely proficient professionals who can manage a large range of lock-related issues. They are known for their attention to detail and dedication to client satisfaction.
- Contact Information: [Telephone number], [Website]
FAQs About Car Locksmiths in Luton
What should I do if I lock my keys in the car?
- If you lock your keys in the car, the initial step is to stay calm. Contact a trustworthy car locksmith in Luton who can extract the keys without causing damage to your vehicle. Avoid utilizing any DIY methods, as they can cause more considerable problems.
Just how much does it cost to get a brand-new car key made?
- The expense of making a brand-new car key can differ depending upon the kind of key and the make and model of your car. Simple keys can cost around ₤ 20-₤ 50, while transponder keys can range from ₤ 50-₤ 150. It's always a great idea to get a quote from an expert car locksmith before proceeding.
Can a car locksmith program a remote key fob?
- Yes, an expert car locksmith can program a remote key fob to deal with your car. This service is particularly helpful if you've lost your remote or need to replace a harmed one.
Are car locksmith professionals in Luton offered 24/7?
- Many car locksmiths in Luton offer 24/7 emergency services to help with lockouts and other urgent lock-related problems. It's an excellent concept to inspect the availability of your selected locksmith before you require their services.
How can I discover a trusted car locksmith in Luton?
- To find a reliable car locksmith in Luton, you can request recommendations from loved ones, read online evaluations, and examine the locksmith's credentials and experience. It's also a great concept to call and ask about their services and rates before deciding.
In Luton, where automotive security is a leading concern, having access to a trustworthy car locksmith is important. Whether you need an easy key duplication or an intricate transponder key programming, the very best car locksmith professionals in Luton are equipped to manage any job. By selecting an expert and experienced locksmith, you can guarantee that your vehicle stays secure and accessible, no matter the circumstance. Do not wait till you're in a bind-- research study and select a trusted car locksmith in Luton today.
Additional Resources
- Luton Police: [Telephone number], [Site]
- Luton Council: [Contact number], [Website]
- Vehicle Association (AA): [Phone Number], [Site]
By following the ideas and recommendations in this guide, you can find the very best broken car Keys luton locksmith in Luton to fulfill your requirements and ensure your peace of mind.


Enhancing Your Conservatory: A Comprehensive Guide to Improvement
A conservatory can be a haven from the stress of daily life, a solar-powered sanctuary where nature and comfort harmoniously coexist. Nevertheless, many conservatories may fall brief of their true capacity through a lack of improvement and upgrades. Whether it's for additional living space, a place to enjoy your garden, or an investment for the future, enhancing your conservatory can offer numerous benefits. This short article will look into useful ways to improve your conservatory and address typical concerns connected to this important space.
The Importance of Conservatory Improvement
Before diving into how to enhance a conservatory, it's vital to understand its advantages. A well-designed and improved conservatory can:
- Add Value: An updated conservatory can considerably increase the property's market worth.
- Enhance Comfort: Improved insulation and heating solutions can make your conservatory functional throughout the year.
- Increase Aesthetics: A refreshing design can raise the beauty of your home.
- Boost Usability: Enhanced performance can change your conservatory into a multi-purpose space.
Secret Areas for Improvement
1. Insulation and Temperature Control
One of the typical downsides of conservatories is temperature level policy. Throughout the summertime months, they can end up being unbearably hot, while in winter, they can be freezing. Here are methods to improve insulation and temperature level control:
- Double or Triple Glazing: Upgrading to energy-efficient glazing can help preserve a steady indoor temperature.
- Insulated Roofs: Consider changing or including insulation to your roof to prevent heat loss or gain.
- Thermal Blinds: These can be set up to lessen heat transfer during severe weather conditions.
2. Heating & Cooling Options
Including reliable heating and cooling services will ensure your conservatory is comfortable year-round.
- Glowing Floor Heating: This low-profile heating unit is effective and offers even heat.
- Electric Heaters: Portable choices or wall-mounted electric heating systems are exceptional for fast warming.
- Ceiling Fans: These can help circulate air in the summer, supplying a cooling result.
3. Aesthetic Upgrades
Your conservatory's look plays a significant role in developing a welcoming environment. Here are some visual upgrades to consider:
- Painting and Decorating: A fresh coat of paint can considerably alter the atmosphere. Pick light colors that can make the area feel bigger and brighter.
- Furniture Selection: Invest in comfy, high-quality furniture that matches the design of your conservatory. Think about add-ons such as cushions and tosses for extra convenience.
- Lighting Options: Incorporate varied lighting services, including pendant lights, wall sconces, and fairy lights for a cozy evening atmosphere.
4. Landscaping and Greenery
Incorporating plants into your conservatory creates a lively environment and enhances air quality. Here are ideas for improving the plant:
- Indoor Plants: Consider types that flourish in various light conditions, hence providing year-round color.
- Vertical Gardens: Installing a vertical garden can develop a stunning focal point as well as conserve space.
- Container Gardening: Use pots and containers to permit for versatility and simple maintenance.
5. Multi-functional Spaces
Changing your conservatory improvement; www.icym.Top, into a multi-functional space can maximize its use. Here are a couple of ideas:
- Home Office: With dedicated shelving and a desk, the conservatory can act as a tranquil and inspiring workspace.
- Playroom: Create an interesting area for kids with toys, video games, and activity locations.
- Dining Room: With the right furniture and ambiance, the conservatory can end up being a classy dining area.
6. Devices and Decor
The right devices can raise your conservatory's design and functionality. Consider the following:
- Rugs: Adding indoor/outdoor carpets can make the space feel cozier while defining areas for numerous usages.
- Shelving: Installing racks can help arrange books, decoration items, or your collection of plants, all while providing visual interest.
- Art and Decor: Hang art pieces or pictures that resonate with you, making the space distinctively yours.
Frequently Asked Questions (FAQs)
What are the advantages of enhancing a conservatory?
Improving a conservatory can increase your home's worth, enhance living conditions, boost looks, and enhance functionality for various functions.
How can I decrease heat in my conservatory throughout summer season?
You can minimize heat by setting up thermal blinds, using sunshades, enhancing ventilation, and incorporating cooling systems like ceiling fans or portable cooling units.
Is it worth it to buy a conservatory upgrade?
Yes, investing in a conservatory upgrade can maximize your roi. Not just does it improve convenience and usability, however it likewise increases the general value of your home.
What types of plants grow well in a conservatory?
Common choices for conservatories include tropical plants such as ferns, orchids, and succulents, which thrive in a warm, humid environment.
How can I make my conservatory more eco-friendly?
To develop a more environment-friendly conservatory, consider integrating energy-efficient heating and cooling options, utilizing sustainable products for furniture, and selecting plants that contribute positively to the indoor environment.
Improving a conservatory is a valuable investment that can substantially boost its performance, looks, and convenience. By focusing on insulation, design upgrades, and multi-use capabilities, homeowners can produce a delightful sanctuary that serves a range of purposes-- from serene reading corners to lively household gathering areas. With the ideal improvements, a conservatory can really become an essential part of a home, linking its occupants with nature while providing an elegant and flexible living area.
Comprehensive Guide to Conservatory Maintenance
Conservatories are a valued addition to numerous homes, providing homeowners with a versatile space that can be made use of throughout the year. Nevertheless, like any other part of a home, they need regular maintenance to guarantee they remain functional, safe, and visually enticing. In this thorough guide, we explore various aspects of conservatory maintenance, highlighting vital tasks, tips, and a FAQ area to assist house owners approach this important responsibility successfully.
Comprehending Your Conservatory
Conservatories usually feature glass roofing and walls to take full advantage of natural light, making them a favorite gathering place for household and buddies. Depending on the design-- whether it be Victorian, Edwardian, or Lean-to-- konservatories can vary in complexity and maintenance requirements. Many people enjoy their conservatories as sunrooms, greenhouses, or play locations, however they also need a dedication to upkeep.
Secret Areas of Maintenance
To help property owners stay on top of conservatory maintenance, it is useful to break down the jobs into workable categories. Below are some key areas of maintenance along with the recommended frequency for each task.
1. Cleaning up the Glass
- Frequency: Twice a year (Spring and Autumn)
- Method:
- Use a soft fabric or sponge with a mild cleaning agent.
- Prevent utilizing abrasive cleaners that can scratch the glass.
- Take note of the frames and any seals to avoid water ingress.
2. Checking and Cleaning Gutters
- Frequency: Twice a year (before winter and after fall leaves fall)
- Method:
- Clear away particles such as leaves, twigs, and dirt.
- Guarantee the downspouts are not obstructed.
- Use a ladder thoroughly or hire a professional if needed.
3. Inspecting the Framework
- Frequency: Monthly
- Technique:
- Inspect for rust, especially if made from metal.
- Look for any signs of rot or decay, especially in wood frames.
- Sand down and repaint where required to avoid more damage.
4. Keeping Doors and Windows
- Frequency: Monthly
- Method:
- Ensure hinges and locks are working efficiently.
- Apply lube to hinges as required.
- Check the seals around doors and windows for air leaks and change if essential.
5. Caring for Flooring
- Frequency: As required
- Approach:
- Depending on the flooring type (tiles, carpet, and so on), tidy accordingly.
- Use proper cleaning services to prevent damage.
- Inspect for indications of moisture which might suggest leaks or condensation issues.
6. Heating and Cooling Systems Maintenance
- Frequency: Annually
- Approach:
- Inspect heating systems or cooling units.
- Clean vents and filters to guarantee performance.
- Call a professional specialist for an extensive assessment.
7. Bug Prevention
- Frequency: Ongoing
- Approach:
- Regularly look for signs of pests such as insects or rodents.
- Take preventive steps like sealing little gaps and guaranteeing proper drainage.
- Consider professional pest control if invasions are discovered.
Seasonal Maintenance Tasks
Various seasons bring unique difficulties and requirements for conservatory Maintenance for conservatory, Https://Employme.app/employer/fix-conservatory-leaks/,. Below is a breakdown of crucial seasonal tasks:

Spring
- Inspect for Damage: After winter season, look for any structural damage triggered by snow or ice.
- Deep Clean: Clean both the glass and surrounding areas thoroughly.
- Inspect Heating: Ensure that heater are functional before the cooler months show up.
Summer
- Shading: Consider setting up shading solutions like blinds or outdoor awnings to lower heat accumulation.
- Window Screens: Install screens if bugs are an issue throughout warmer months.
Fall
- Seamless gutter Cleaning: Remove leaves and particles to avoid blockages.
- Avoid Heat Loss: Check seals and think about changing window treatments to enhance insulation.
Winter season
- Snow Removal: Carefully eliminate snow from the roof and avoid using too much pressure that may damage the structure.
- Monitor for Ice: Check for any ice accumulation that could affect drain or damage the roof.
Often Asked Questions (FAQs)
1. How frequently should I clean my conservatory?
It is recommended to clean your conservatory a minimum of twice a year to keep look and functionality. More frequent cleaning may be needed depending on environmental elements.
2. What are the indications that my conservatory needs repairs?
Signs can include leaks, drafts, noticeable damage to the structure, or condensation and mold growth. Regular evaluations can help capture these issues early.
3. Is professional maintenance necessary?
While many maintenance tasks can be performed by property owners, professional help may be useful for complex issues or hard-to-reach areas, specifically when dealing with heat and cooling systems.
4. How can I improve the energy effectiveness of my conservatory?
Consider installing energy-efficient glass, including window treatments, weather removing, and correct insulation to improve energy performance and decrease cooling and heating expenses.
5. What products should I have on hand for conservatory maintenance?
Secret maintenance items consist of cleaning solutions, tools for repairs (like screwdrivers and wrenches), lubricant for hinges, and gloves for handling products.
The upkeep of a conservatory includes different tasks focused on preserving the structure and enhancing the enjoyment of this flexible space. By following these maintenance guidelines and being proactive in addressing prospective issues, homeowners can ensure their conservatory remains an inviting and functional part of their home for many years to come. Regular maintenance not only secures the investment in the conservatory but also improves convenience and visual appeals, making it a precious function of domesticity.